
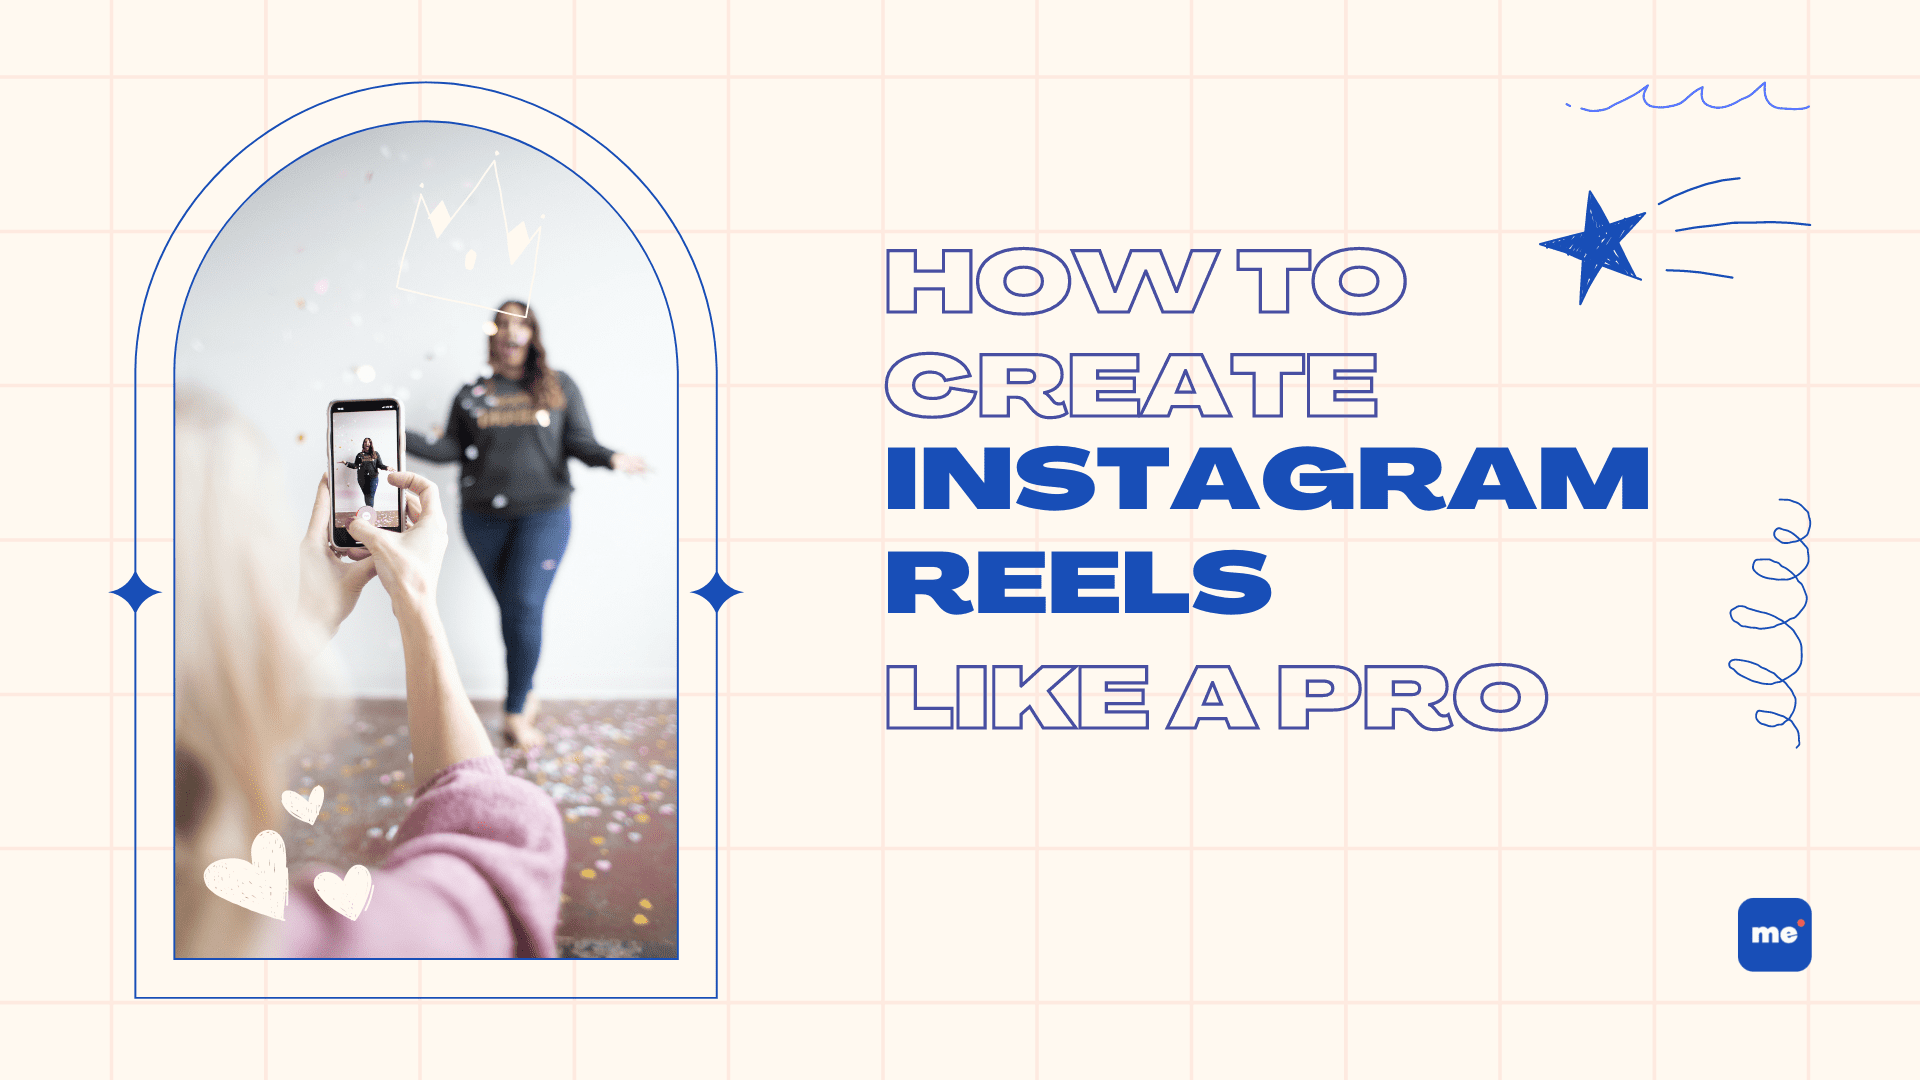
How to Create Instagram Reels like a Pro

If you’re an avid user of social media, specifically Instagram and TikTok, then you’ll be familiar with the power of short-form video content. Since TikTok’s boom in 2020, Instagram has followed suit in that category. While Instagram’s platform already offers its regular feed, carousels, Instagram Stories, it has since announced that new video posts on Instagram will now be shared as Reels. So, they’re more important than ever now.
In this guide, we’ll dive into what Instagram Reels are and how your brand can leverage this short-form video content for your audience.
Instagram Reels are Instagram’s version of publishing short-form videos on their platform, similar to the likes of the all-so-popular TikTok. They’re fun and casual short-form videos displayed in a vertical format to create an immersive experience for users to scroll (endlessly).
Compared to its long-form counterparts that are more polished, Reels are a great way to publish the casual videos your brand wishes to share. Similar to TikTok, it has built-in editing tools to help make your videos more fun and engaging or have the option of posting without editing through the app.
These videos can range from 15-90 videos long with the option to add trending audio, interactive stickers, background image, texts, and filters. Creators typically showcase more bite-sized videos that are easily digestible and allow users to be quickly entertained. In fact, Instagram has made Reels highly accessible—they can be added to a user’s feed, found under a tab on user profiles, and in the navigation bar below.
The beauty of Instagram Reels is that you can take longer footage from other platforms to repurpose into bite-sized videos to tease and boost engagement on the platform. Plus, the way the Instagram algorithm works is that it suggests Reels to users based on their interests, making them a valuable tool to tap into new and relevant audiences.
There are a few ways to get started on creating your Instagram Reel since the app’s interface is designed to make it easy for users.
Reels are the perfect opportunity to tell stories. Before you begin, it’s best to plan and storyboard your Reel. There are a few things to consider as you plan:
Once you understand your audience and direction, you can begin to put your storyboard together. Then, you can have a visual understanding of how your Reels will turn out and plan what clips you need to shoot in order to bring the whole concept together.
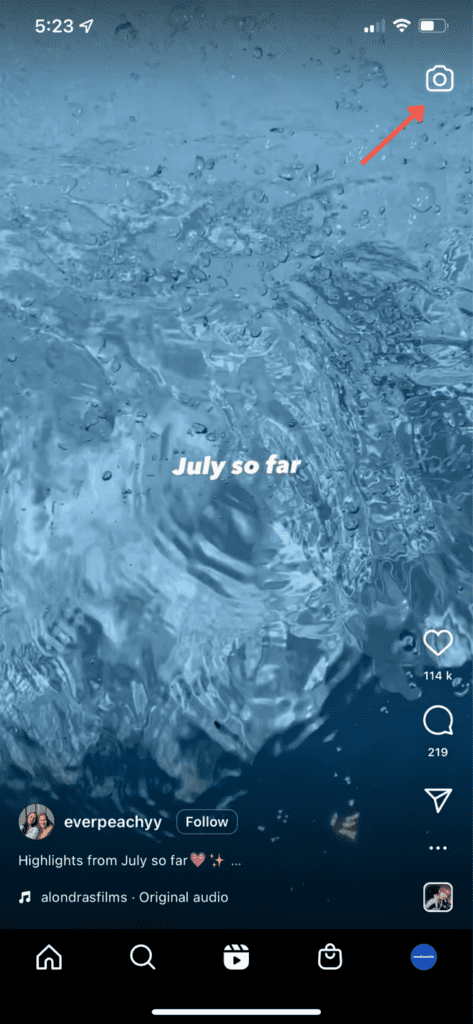
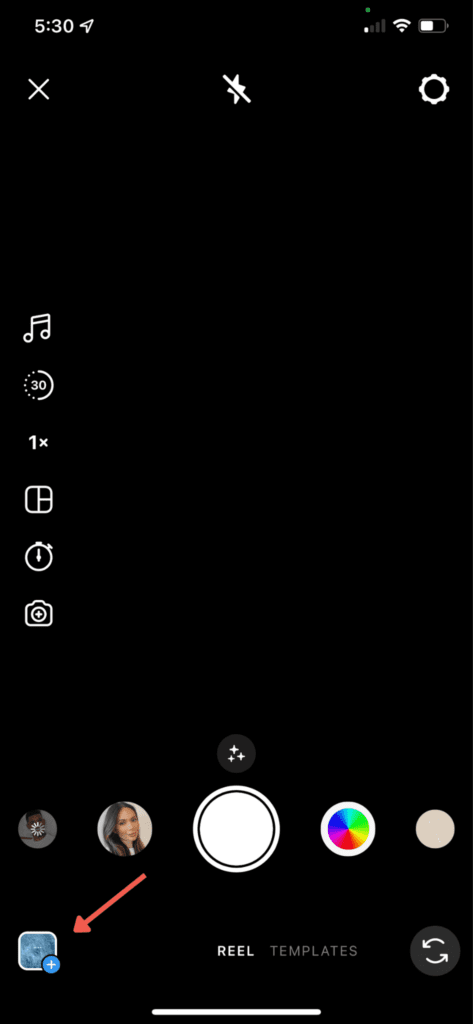
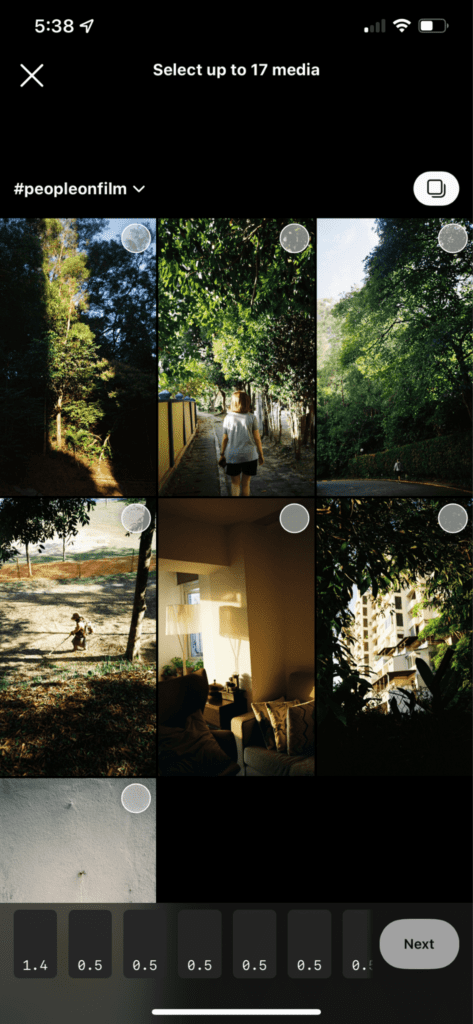
There are multiple ways to record and create your Reels–via the Reels tab, Instagram home screen, or the Instagram Stories camera.
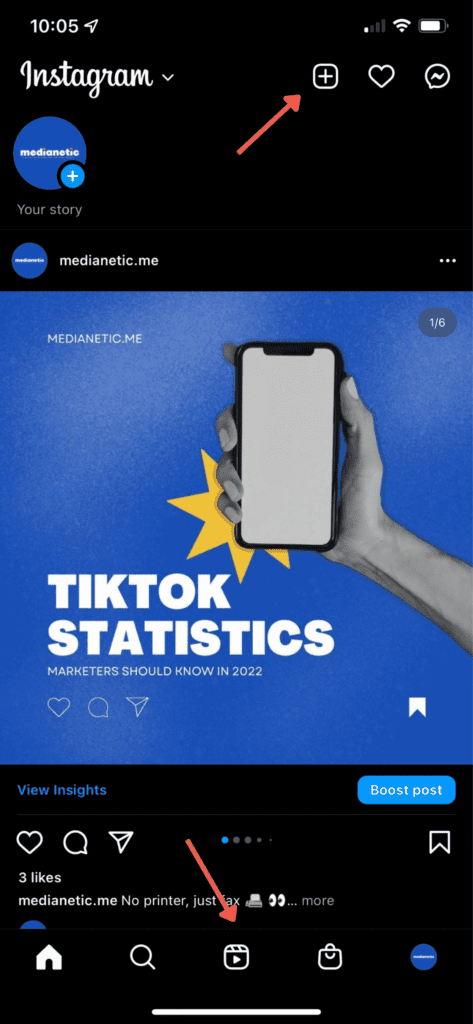
Home Screen
Reels tab
Instagram Stories camera
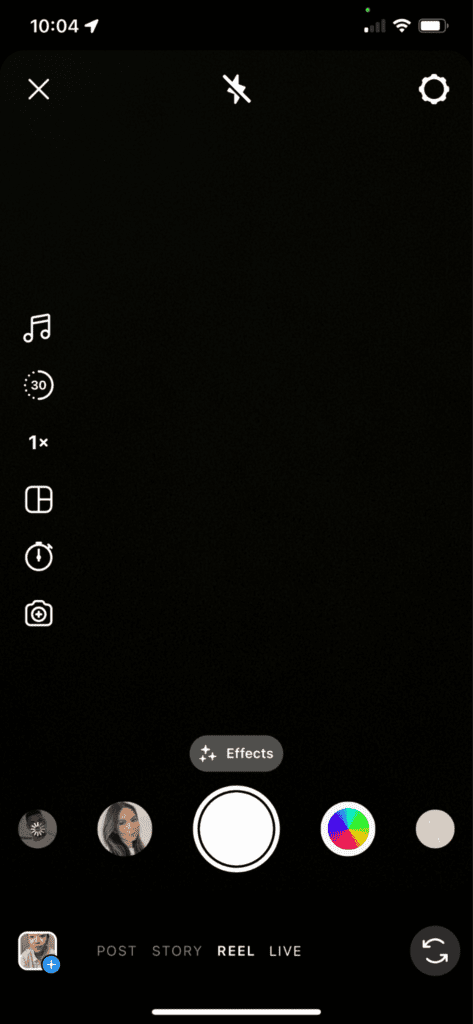
Like TikTok, Reels can be recorded in a series of clips, in a single recording, or shot externally to be uploaded on the app.
To record straight within the app, hold the recording button in the middle of the screen.
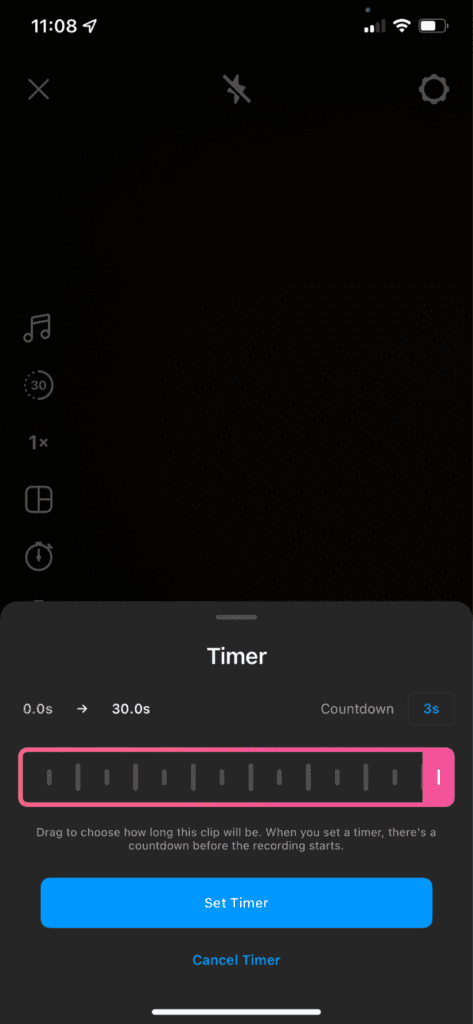
For hands-free filming, use Instagram’s timer and countdown feature. This timer is really helpful for when you need to record hands-free and without help. The countdown can be set to 3 seconds or 10 seconds, to position your video subject with ease. Plus, if you’re filming something with more stop-starts, you can set the timer to automatically stop recording at any point. You just need to drag the pink bar forward to where you want it to stop.
Once you’ve begun recording videos on the app, you also have the option to align your clips. This tool is handy for creating those seamless transitions between clips in your video. You’ll most probably have seen this kind of content in outfit or fashion videos.
Sounds and audio are one of the biggest aspects to creating engaging Reels. Instagram knows it too. That’s why they make it easily accessible for creators to choose music and audio from their music library. This gives users the creative freedom to find sounds that complement their Reels the best.
After you’ve nailed down the editing of your Instagram Reel, it’s time to share it.
Tap “Next” to choose your cover photo and write a caption that hooks your audience to your Reel. Remember to check the settings below if you’d like to share your Reel to your Instagram Feed. If you want to boost your Reel’s reach, we recommend sharing it to Feed.
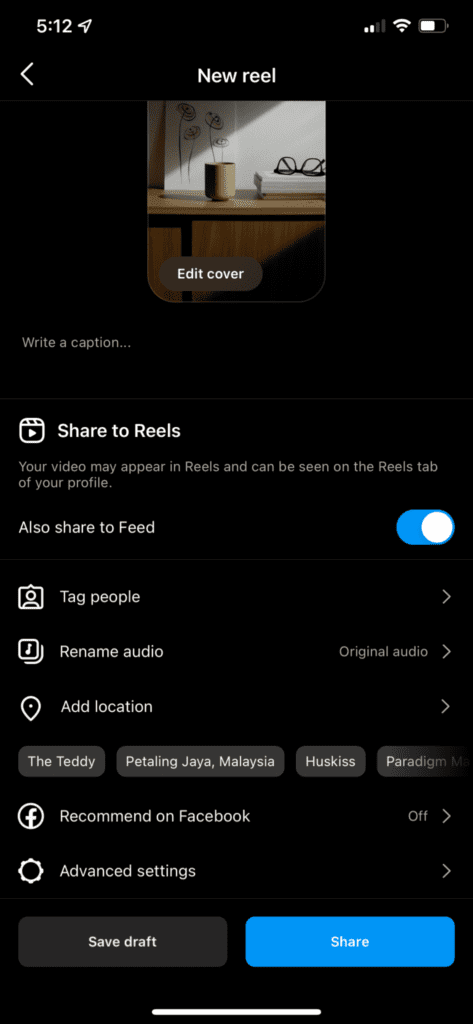
You can also tag other Instagram users in your Reel–where there’s the option to invite a collaborator. If the user accepts the invite to collaborate, your post will be shared on their Profile with their followers, and they’ll be shown as co-author on the post.
If you’d like to increase your reach, tap the “Recommended on Facebook” button and it’ll be shown to anyone on Facebook.
And there you have it! Tap “Share” and you’ve successfully posted your first Reel.
Take your Instagram presence to new heights with Reels that increases your reach, builds trust, and connects with your audience. Short-form videos are here to stay, so get started with Reels on Instagram today! Remember to experiment and have fun when you create your next Reel for your brand.
Are you looking to create effective and fun Instagram Reels content that drives leads? We’re here to help. Get in touch with us at hello@medianetic.me, or drop us a message via our chatbot below! We’ve worked with many different industries like associations, banks, FMCG, and more. We look forward to implementing our expertise to help you succeed.


Medianetic Sdn Bhd
200301016995 (619415-K)
No. 59, 2nd Floor, Block E, Zenith Corporate Park, Jalan SS7/26 Kelana Jaya, 47301 Petaling Jaya, Selangor
hello@medianetic.me
+603 7960 3088 (Office)
Medianetic Sdn Bhd © 2023
Made by Medianetic